

Friday Five : April 24th 2020
Friday, 24 April 2020
Hi. I thought I'd bang out a Friday Five. Nothing fashion related - just things and tings off the top off my head. I've not done one since we started lockdown and I've not even been sure what to talk about but I just felt that now we're a month in, I can do my thing again. So not many pretty photos apart from one of some tulips and my usual lot of gibberish.

Pretty ... but I prefer white ones.
I normally buy white tulips but they didn't have any white ones in Aldi when I did my weekly shop so I decided to opt for a super cheery coloured bunch as there was a little something in me that said "we need a little happy colour". I stared at them for a few days till they did my head in and moved them somewhere out of sight.
Friday Five (2 of 5) Fruit Flies
I spotted an online discussion about fruit flies and how there seems to be an increase in them of late and more importantly - how to deal with them. Have you noticed how apart from fruit, they seem to land in your red wine if you drink red wine that is? They seem to be drawn to the vinegary note. So put a little dish out with some red wine vinegar (if you want to hang on to your precious wine) and cover it with some cling film. Pop a few holes big enough for the flies to get in. They get drawn in by the smell, pop in through the holes and then get addled and can't find their way out. I caught about 20 today! #SuetheFruitFlySlayer
Friday Five (3 of 5) Rich Tea Biscuits
That's my biscuit of choice currently. Oreos are George's choice. Custard Creams are Ben's. And Ginger Parkin biscuits are the hubby's. What's your biscuit of choice?
Friday Five (4 of 5) Spaghetti

That hole in the spoon actually has a purpose.
Do you have one of those spaghetti spoon things? One of those funny shaped utensils which help with ladling out spaghetti? Well have you noticed they have a hole in the middle of the spoon? Did you know the size of that hole is exactly one portion of spaghetti?
Friday Five (5 of 5) Banoffee Pie
I'm bored of banana loaf so I thought I'd make banoffee pie. I'm not sure why as I don't even like bananas that much. So I bought a tin of Caramel Condensed Milk - this is the shortcut if you don't want to boil a tin of condensed milk for hours to make it caramelise. Shortcuts all the way for me! However, you need a loose bottom flan tin to make it easy to lift out your "pie". I don't have one of those. Back to banana loaf then.
-------------------------------
Last Note :
- It goes without saying. Thank you to all the people out there still working and trying to keep this world of ours ticking over during Covid 19. I'm not great with words but just "Thank you".

Get Crafty : Bandana Sandals
Thursday, 16 April 2020


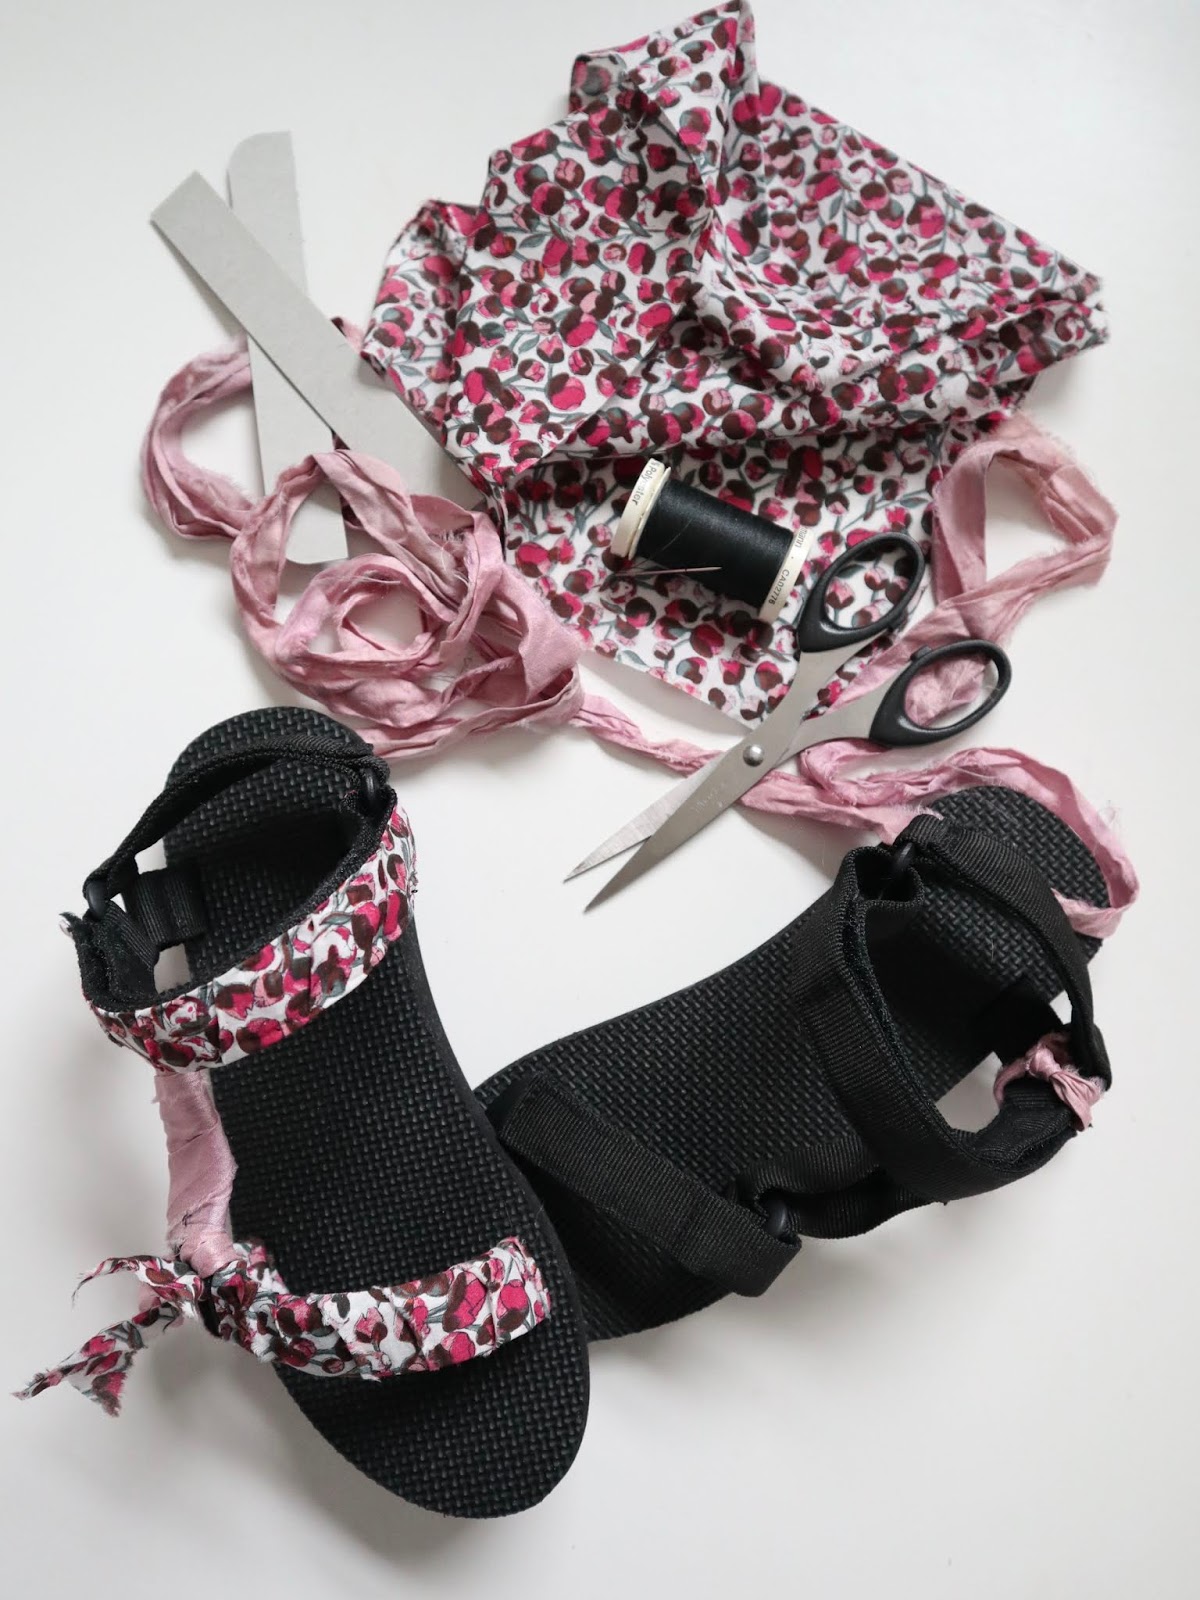
What you will need.
- Pair of black Teva like walking sandals / Teva Sandals
- 0.25 to 0.5m of cotton fabric of your choice.
- Needle and matching thread.
First of all, credit where it's due - I actually stumbled across this blog post at the beginning of the year when I decided I wanted a pair of Arizona Love sandals and then realised it was someone doing a tutorial on how to make their own version of them. I took the tips that I wanted from it and changed them to suit how I wanted my sandals to look and work.
The most fun bit is creating the fabric strips which you will be using to wrap around the straps of your sandals. These look best with the edges a little roughed up and to do this you need to tear the strips which is roughly the width of the sandal bands. I find the finished edge of the fabric and make a small cut.

The cardboard strip is the width of the sandal straps.
Then I hold the fabric either side of the cut and rip. You know like when you go to the fabric counter and you tell the lady how much you want and she measures out and then does a snip with the scissors and then she tears the fabric along the rip and your heart stops for a moment and you hold your breath? That's basically what you do. It is so so satisfying. If the strips are a little rumpled, just give them a little iron to make them a little easier to work with.

Don't be scared. Let rip(!)
Next adjust your bottom sandal strap near your toes to make sure they fit comfortably and velcro in to place. I've chosen to make this a fixed strap on my sandals rather than an adjustable one - you can keep it an adjustable strap - just see the instructions for how I sew the upper sandal strap.
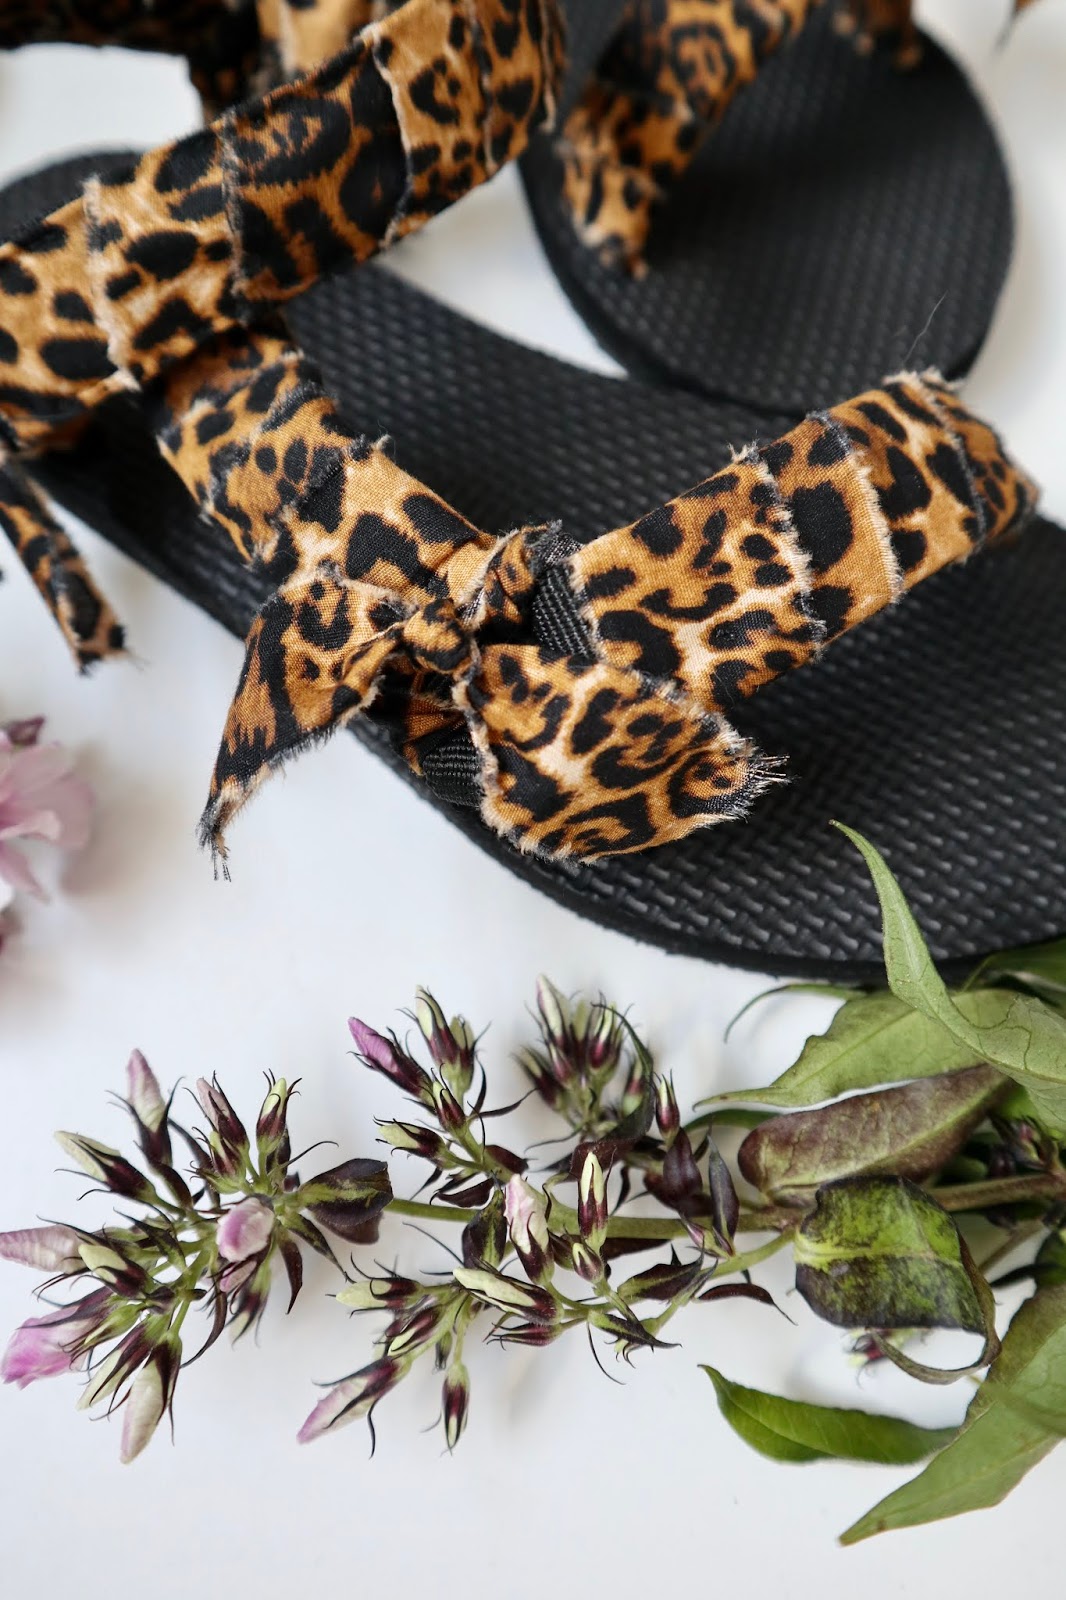
I start wrapping from the big toe side working towards the triangle fastening. At the start, I like to secure the material with a few stitches.

Wrap the ribbon strips around the band but to avoid the strips moving with friction as you wear them, I add a few extra stitches under neath to secure the ribbon to the sandal strap. This is the simple way.

Or alternatively, you can sew the ribbon to the strap carefully disguising your stitching as you go along if you have time and patience. I've made a few pairs and have tried both methods and both work.
Leave a good amount of fabric when you get to the triangles as you will be using this to create the knotted ties. You basically need to repeat similar for the other strap bands on the sandals apart from the top velcro fastening one. Where the long pieces meet at the triangles, these are where you will be tying to create the "bows". Trim to required length after tying securely and make sure you wrap around the triangle fastenings for extra security.


Iron the wrapped fabric on the cardboard strip and then unravel from the cardboard.

And then reassemble it again (I used a running stitch along the length just to hold it in place) and you will lay this across the top strap. Pin to the strap to help you as stitch.


If you look close up, you can see where the tiny stitches are.
I've finetuned this since I first did this.
That's essentially it. I also stared at a lot of Arizona Love images of their sandals to work out where they tied everything to recreate as close to their design as possible. In this case, I took the old saying of "imitation is the sincerest form of flattery" to it's limit.
Additional Notes.
- I used a Rose and Hubble print cotton for the leopard ones - this is the most easy to find online if you google Rose Hubble Leopard Fabric. I found mine on Ebay.
- The floral fabrics I used for my sandals was a Liberty London remnant and I also used some recycled pink silk sari ribbon from eBay but changed my mind about using that (too girly for me) - hence why the sandals in the very first few pics are slightly different to the ones pictured going through the post.
- The Teva style sandals were bought from Amazon. The ones I used were Riemot. There is another brand called Fitory who do very similar ones but the sizing on theirs was a bit hit and miss - I could have just been unlucky but I think they come up small.
- Just work it out as you go - that's all I did. It took a few times and stitching and resewing till I was really happy with the finished result but then again ... I'm a perfectionist.
- Apologies for the quality of the photos, they were done on the fly on a dull February afternoon where I was racing against the light going.
- Have fun!
Subscribe to:
Posts (Atom)
Social Media